How to Plan Your Thru-Hike Resupply (Without Going Hungry)
Beat thru-hike hunger: master mail drops, trail-town shopping, and backup tricks for when the only store is a gas station.
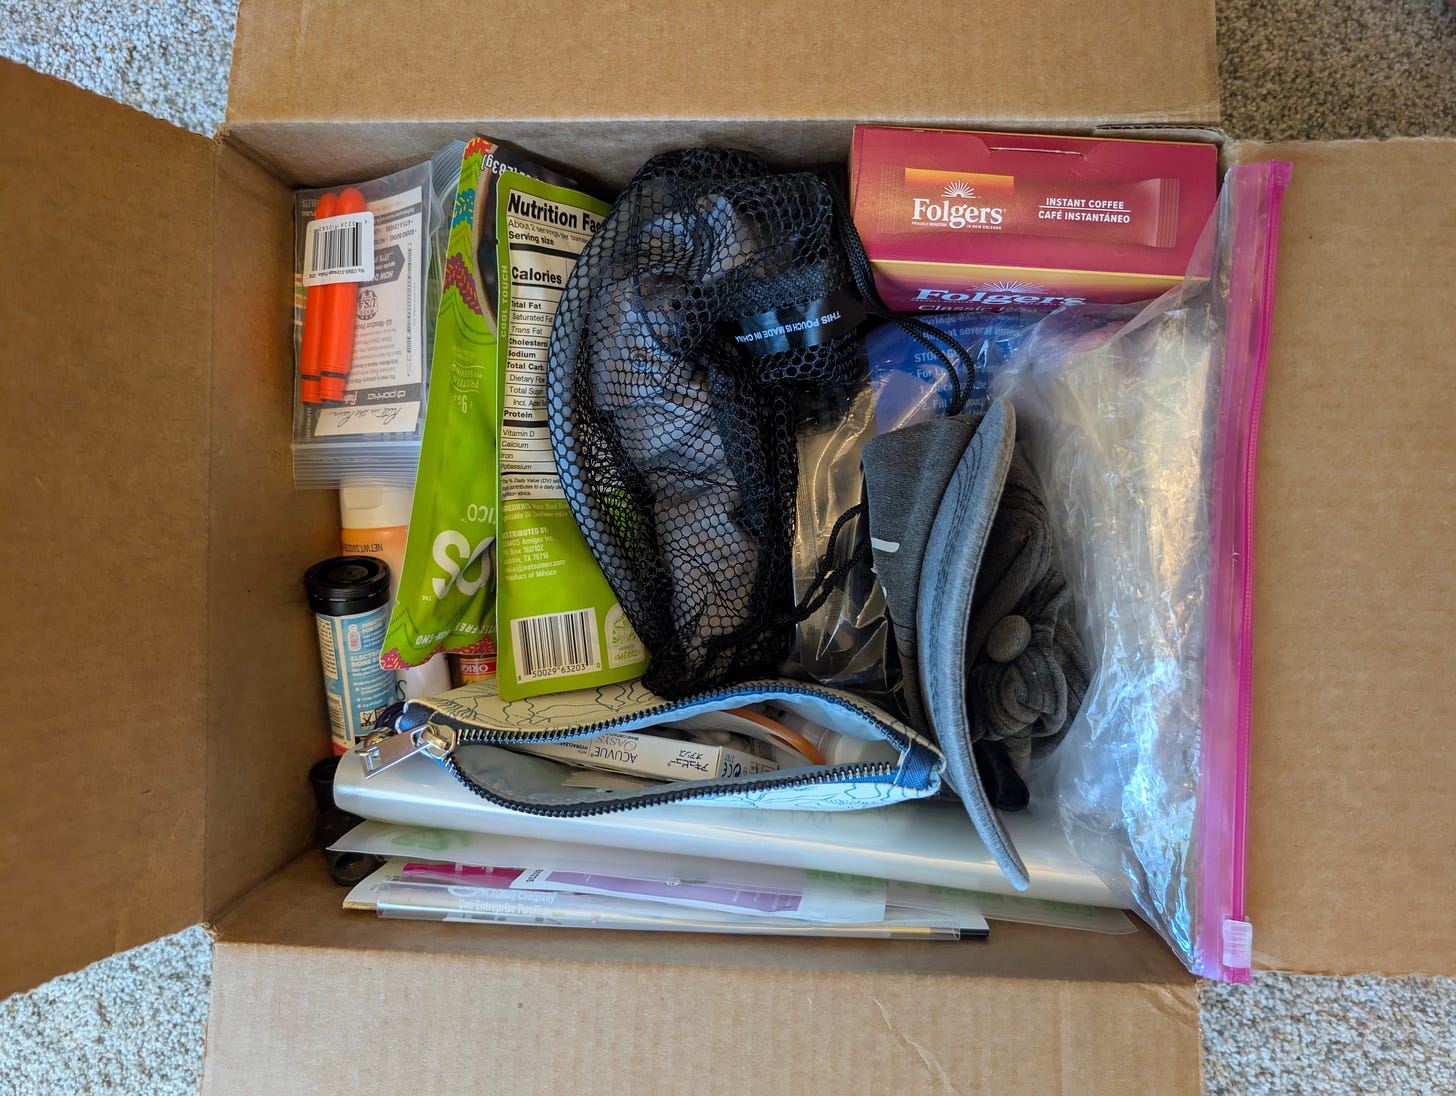
Resupply planning is a crucial part of thru-hike logistics. It’s the answer to that burning question every beginner asks: “Where do I get my next batch of food, and how do I send myself stuff on trail?”
If you’re new to long-distance hiking, this whole resupply thing can sound a bit overwhelming. (I’m literally neck-deep in it right now, prepping for my first big solo thru-hike in August – picture me surrounded by a mountain of ramen packets, protein bars, and post-it notes with town names.) The good news is, with a little strategy, resupply becomes a much smoother, almost routine part of your adventure.
Let’s break down how to plan your resupply like a pro, in a way that keeps both your stomach and your sanity sound.
Know Your Trail Towns and Distances
First up: do your homework on where you can actually resupply along the trail. Before you even set foot on the trail, spend some quality time with maps, guidebooks, and apps plotting out the towns or outposts you’ll pass. Every trail is different. On the Appalachian Trail (AT), civilization is never too far – you can often stumble into a store every 3–5 days if you plan it right. The Pacific Crest Trail (PCT) or Continental Divide Trail (CDT), on the other hand, have some gnarly remote stretches (100+ mile wilderness segments where the only “store” might be your own backpack).
Use trusted guides and apps (FarOut, AWOL Guide, Yogi’s Handbook, etc.) to figure out where the trail crosses a road and what towns or facilities are nearby. Mark those spots on your map or spreadsheet along with the mile marker.
Know your distances: if you see two towns are 70 miles apart and you typically hike ~15 miles a day, that’s about 5 days of food you’ll need for that section (I always tack on one extra day of snacks just in case something throws me off schedule).
On a shorter trail like the Colorado Trail (~485 miles), for example, many hikers plan resupplies roughly every 4–6 days. Plotting it out this way gives a clear picture of how many days of food to pack between each town.
The goal here is to never have to hike hungry because you miscalculated the gap to the next store. Better to carry a bit more food weight than to run out of snacks a day short of town (hiker nightmare fuel, right there).

Mail Drops vs. Buying as You Go
When it comes to actually getting your food, there are two classic approaches: mail yourself packages ahead of time, or buy food locally as you go. Most of us do a little of both. Each method has its perks and pitfalls, so let’s lay it out:
Mail Drops (Sending Boxes Ahead): You prep boxes of food before your hike and mail them to post offices, hostels, or friendly trail angels along the route.
Pros: You get to curate every calorie – great if you have dietary needs or just really love your Aunt Marge’s homemade jerky. It can be cheaper overall since you can buy in bulk at Costco and divvy it up (also, no sticker shock from tiny mountain-town grocery prices). Plus, in really remote spots with maybe only a gas station store, you’ll have exactly what you need waiting for you.
Cons: Less flexibility. You’re committing to meals weeks (or months) in advance… tricky if you suddenly cannot face another packet of oatmeal by Week 6. You also have to time it right to pick up during post office hours (nothing worse than rolling into town on a Saturday afternoon to find the post office closed until Monday). And let’s not forget those shipping costs and the mild absurdity of paying postage to mail yourself instant rice and Clif bars across the country.
Buy As You Go (Resupply Locally): This is the freestyle approach – roll into town, hit the local grocery or outfitter, and buy whatever food looks good in the moment.
Pros: Ultimate flexibility. Craving pickles and ice cream by the time you hit town? You can satisfy it immediately. You only carry what you decided you wanted that very week. It’s also fun and supports local businesses; you get to explore every quirky small-town store (there will be plenty of old general stores with personality).
Cons: Selection can be extremely limited and prices high. We’re talking $8 for a mediocre dehydrated meal in some outposts, or stores where dinner options boil down to canned chili, Pop-Tarts, and maybe an onion. If you have any special diet needs (vegan, gluten-free, etc.), the one gas station in Nowheresville might not have your preferred fuel. So you could end up surviving on potato chips and candy if you’re not careful. Also, shopping while ravenous is dangerous to your wallet – everything looks delicious when you’ve been hiking hungry. (Pro tip: try to get a snack or meal before hitting the store so you don’t buy three times what you actually need. Hiker hunger is real, y’all.)
Many hikers find a happy hybrid strategy: mail yourself boxes to a few key remote locations where stores are nonexistent or lousy, and buy-as-you-go in trail towns that have decent supermarkets. If you’re a fan of meal-prepping, prepare to save even more money!
here’s a good rule of thumb: if a stop has no grocery or only a sketchy mini-mart, plan a mail drop there. If the town has a real grocery store (or better yet, a Walmart or large supermarket), save your postage and just resupply on arrival. This way, you ensure you’re covered when options are slim, but you still get spontaneity (and fresh avocados, if you’re lucky) elsewhere. It’s all about balancing cost and convenience: mailing in bulk can save some cash per meal, but don’t forget you’ll pay for shipping those boxes and maybe a fee if you send to a hostel. Meanwhile, buying along the way might cost a bit more day-to-day (small stores can be pricey), but you won’t overspend upfront on a ton of food that you might not even eat.
For the budget conscious, here are a few more things to keep in mind when mailing resupply boxes:
Buy labels online through a shipping aggregator (Pirate Ship, Shippo, EasyPost): You’ll save 10-25 % on UPS Ground—the platforms pass through negotiated commercial rates. UPS often undercuts FedEx by a couple bucks.
Lock in dimensional weight: Measure the box and keep the girth small. Anything over 1 cu ft gets billed like an 11-lb package instead of 6 lb. Slice flaps off; use “book fold” if needed.
Ship mid-week and schedule free pickup. Dropping on Tuesday-Thursday avoids Monday lobby lines and any Friday “additional handling” rush fee some UPS Stores tack on.
Skip extra insurance. UPS/FedEx cover $100 by default. Your ramen and gummies aren’t worth an up-charge.
Consolidate to fewer, heavier boxes. Two 6-lb Ground boxes (≈$70 total) nearly always cost more than one 12-lb box (≈$41).
Send bounce boxes only to the toughest gaps. Buy fresh food in towns where the grocery there is cheaper than shipping tuna packs. Reserve mailed drops for genuinely remote stretches.
Personally, I’m planning to mail myself some of my favorite homemade dehydrated dinners to a couple of remote spots (because I know I’ll want real veggies and my special curry noodles out there). For everywhere else, I’ll wing it with local shopping, even if it means paying a few extra bucks or getting creative with whatever the store shelves offer. Budget-wise, it tends to even out, but if you want more detailed money talk on thru-hiking, check out this blog:
Adventure Finance: Budgeting Your Thru-Hike Expenses
Embarking on a thru-hike is not just a physical challenge – it’s a financial journey too. In fact, money woes are one of the top reasons hikers end their trek early. But with a solid budget and smart planning, running out of money won’t be what stops you.
Leverage Your Planning Tools (Miles, Meals, and Spreadsheets)
So, there’s a bit of math involved in resupply planning. Before you flash back to high school algebra, know that there are awesome tools and tricks to make it easier. Resources like Craig’s PCT Planner, the FarOut app, or good old Google Sheets can help you estimate how many days are likely between your resupply points.
Essentially, if you know the next town is 70 miles away and you typically hike ~15 miles a day, you’d plan for about 5 days of food. Always, always throw in an extra emergency day of food if the stretch is long or terrain is tough – stuff happens. Maybe you get injured and have to slow down, maybe a lightning storm forces you to hunker down and stop early one day. You’ll never regret having one more packet of noodles or an extra Snickers bar for “just in case.”
Take advantage of planning tools to crunch the numbers for you – input your pace, the distance, and it will spit out an estimate of days. Or create a spreadsheet listing each leg of your hike with the start and end points (Trailhead to Town X, Town X to Town Y, etc.), the mileage, your expected miles per day, and voila: you have a resupply schedule. You don’t need to be meticulous (in fact, expect to tweak this on the fly), but having a ballpark plan is key.
As you go, you might hike faster or slower than expected, so those estimates will shift. That’s okay! The plan isn’t carved in stone; it’s just giving you a roadmap so you’re not playing calorie roulette in the wilderness.

The “Bounce Box” (Your Traveling Treasure Chest) – Optional
Ever wish you could have a magic stash of goodies that follows you up the trail? That’s basically the idea of a bounce box. This is an optional resupply trick some hikers use: you fill a box with items you’ll need eventually but not all at once, and you mail it from town to town ahead of yourself as you hike. It’s like leap-frogging your own supplies. For example, maybe you have specialized items like vitamins, extra toiletries, backup charger batteries, or those amazing home-dried mango slices you don’t want to carry 500 miles at a time. You can put them in a box and send it to a town 200 miles up trail. When you arrive, you pick it up, take what you need for the next stretch (maybe grab a new tube of toothpaste, swap out your broken headlamp, or finally get those mangos), then seal it back up and mail it forward again to another town further up.
This strategy can be super handy if you’re trying to avoid carrying everything from the start, or if you know you’ll need certain gear seasonally (like a thicker jacket for the Sierra Nevada, or your microspikes once you hit the Colorado high country).
Beware, though: postage costs can add up each time you bounce the box, and you’ll have to coordinate pickup just like any mail drop. Some hikers love their bounce box because it provides a safety net of supplies and a bit of home comfort in each town. Others skip it because it can be a hassle or expense they don’t need. It’s totally a personal choice – weigh the cost vs. the joy of having that jar of peanut butter or extra batteries waiting for you every few weeks. If you do use one, try to keep the box light and filled with useful stuff (heavy or cheap items might be easier to just buy as needed instead of mailing over and over). Think of it as your traveling pantry/gear closet that you can dip into along the journey.
Stay Flexible and Adapt on the Fly
Now for maybe the most important piece of advice: even the best resupply plan will hit some bumps. And that’s okay! Flexibility is the name of the game in thru-hiking, and resupply is no exception. Maybe you roll into a town only to find the lone grocery store closed for a local holiday (it happens). Maybe you planned for 5 days of hiking but the section was tougher than expected and it’s going to take 6. Or perhaps by month two on trail, you cannot stomach the thought of another protein bar and you’d trade your trekking poles for a fresh apple. The key is to adapt and not panic.
You can always adjust as you go. In a pinch, you might find an unexpected side exit to a highway and hitchhike into an earlier town if truly necessary (safety first – only if it’s a safe option and you’re comfortable; solo hikers, always trust your gut and check out our guide on Solo Female Thru-Hiking: Sisterhood of the Traveling Baddies for staying safe and confident out there). You can also get creative: maybe you overbought food in the last town (those 12 packs of Pop-Tarts seemed like a great idea at the time...). If your next leg is shorter, you could mail some of that surplus ahead to yourself at the following town, effectively turning your oversupply into a mini mail drop rather than lugging it all on your back.
Hiker boxes – communal bins where travelers toss unwanted food/gear – are another wildcard. You might swap out your extra oatmeal packets for someone else’s spare mashed potatoes, keeping your menu interesting.

The point is, stay flexible and resourceful. A resupply plan is not a rigid contract; it’s a living, breathing framework. The trail loves to throw curveballs, but with a little flexibility, you’ll catch ’em and carry on. By the end of your trek, you’ll feel like a resupply ninja, effortlessly adjusting on the fly.
Quick Logistics Tips for Resupply Stops
To wrap up, here are a few rapid-fire tips that can make each resupply stop efficient and even enjoyable:
Have a Game Plan for Town: Before you stroll into a trail town with mud on your boots and dollar signs in your eyes, know what you need to accomplish. Typically my routine goes:
1) Get some real food first. (Trust me, attempting a grocery run on an empty, calorie-deprived stomach is a recipe for overspending and ending up with five cans of Pringles and no actual dinner food.)
2) Sort out your resupply. If you mailed yourself a box, go pick it up pronto and sift through it (bonus points if you mailed it to your hostel). If you’re shopping local, hit the store with a list (mental or written) of how many breakfasts/lunches/dinners you need for the next section. Stick to the essentials first, then add treats if you have room/budget.
3) Repack your food before you leave town. Ditch excess packaging, organize meals by day, and make sure it all fits in your food bag. This prevents the nightmare of discovering a mile out of town that you forgot to buy coffee or that your new jars of peanut butter don’t actually fit in your pack.
Pre-Mark Your Maps or Notes: Before your hike (or during a zero day), jot down how many days of food you plan for each segment and where your boxes are sent. Having a little cheat-sheet in your phone or notebook saying “Neels Gap: 3 days to Hiawassee (buy in town); Kennedy Meadows: box mailed with 7 days food for Sierra section” is super helpful. It’s like leaving bread crumbs for your future self. You’ll roll into each stop already knowing “I need to buy for X days” or “I have a box here.” This reduces decision fatigue when you’re exhausted from hiking.
Listen to Your Body (and Taste Buds): Your appetite will likely explode a few weeks in. If you find yourself consistently running out of food between towns or fantasizing about cheeseburgers 24/7, adjust your plan. Add an extra snack per day or up your daily calorie count. Conversely, if you always end up with two uneaten dinners in your bag, you can probably pack a bit less next time. Also, don’t be afraid to change up the menu as you go. That trail mix you loved in Week 1 might become utterly gag-worthy by Week 5. Swap it out, hit a different snack aisle, spice up your life.
Resupply planning might feel like a lot to chew on at first, but with practice it becomes second nature.
By the time you’re a few weeks into the hike, you’ll know exactly what and how much you need, and stops in town will be exciting instead of stressful. Embrace the process, and remember that every hiker’s strategy can be a little different – you’ll fine-tune what works best for you.
You’ve got this! With a solid resupply plan, you’ll keep your engine fueled for all those miles to come. And if you need a little extra help figuring out what to pack or how to lighten your load (because carrying six days of food is easier when your gear is dialed in), don’t miss our official lightweight backpacking gear list for tips on trimming weight without sacrificing the essentials.
Comment below: What’s your resupply style?
Are you Team Mail Drop, Team Buy-as-You-Go, or a hybrid hustler?
Got any pro tips or hilarious mishaps from the resupply rollercoaster?
We’d love to hear your stories and questions! Happy trails and happy munching!